Most of the time while working on a robot you would like to debug directly on the robot. Indeed you don’t want to plug sensors and motors to your computer to debug an app. Unfortunately my previous strategy was to add prints where I thought it could be useful, recompile, restart etc again and again. Debugging remotely will allow you to see which functions are called, place breakpoints in the code, check variables … Everything with an IDE on your own computer!
Since I mainly use Qt Creator for c++ development this tutorial will go through the steps with Qt Creator but of course you can reproduce it only with GDB.
To debug remotely you will of course need to be able to connect over ssh to the robot/server (but we will use “robot” until the end). We won’t have to install any IDE on the robot.
For the purpose of this tutorial we will work on a very simple project called “teste” (not test because test is reserved by cmake). The project contain only one cpp file and a CMakeLists.txt to simplify compilation (especially debug one).
Program setup
File tree.
├── build/
├── CMakeLists.txt
└── test.cpp
CMakeLists.txtproject(Teste)
add_executable(teste test.cpp)
test.cpp#include <iostream>
#include <unistd.h>
int main(){
int i = 0;
while(1){
i++;
usleep(1000000);
std::cout<< "Hello" << std::endl;
}
return 0;
}
The project will be placed in /tmp (of the robot). Then compile itcd /tmp/teste/build
cmake -DCMAKE_BUILD_TYPE=Debug ../
make
Here we compile in debug because you will have access to set breakpoints etc. Then symply run it and we will inspect it later!
Setting up the Robot
On the robot you will have to install gdbserver and also to allow non-parent (and non root) process to ptrace the program to debug.sudo apt install gdbserver
echo 0 | sudo tee /proc/sys/kernel/yama/ptrace_scope
The default value of /proc/sys/kernel/yama/ptrace_scope is 1 (In case you want to set it back). And that’s it (for the robot).
Setting up your computer
Of course you will need Qt Creator (gdb should be installed as well).
Connect Qt Creator to your robot
Start Qt creator and go to Tools -> options Then directly go to Devices Here in Devices you will add your device (your robot) So click Add… then Generic Linux Device Fill with the IP of you robot, the user and the password (or ssh-agent).
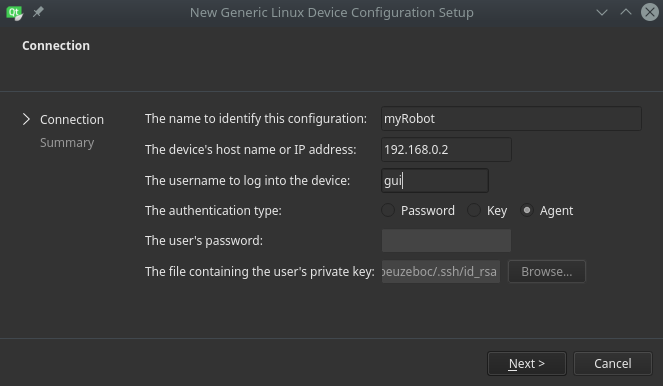
Then Qt Creator will test your connectivity to the robot.
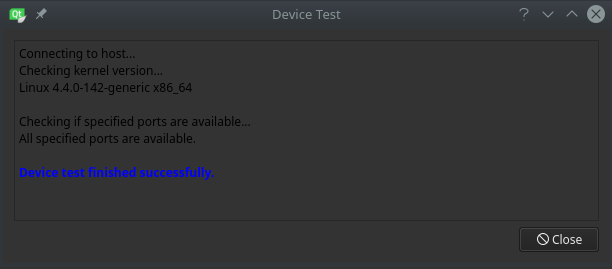
GDB
Make sure GDB is installed and detected by QtCreator Tools->options->Build & Run / Debuggers You should see something like:
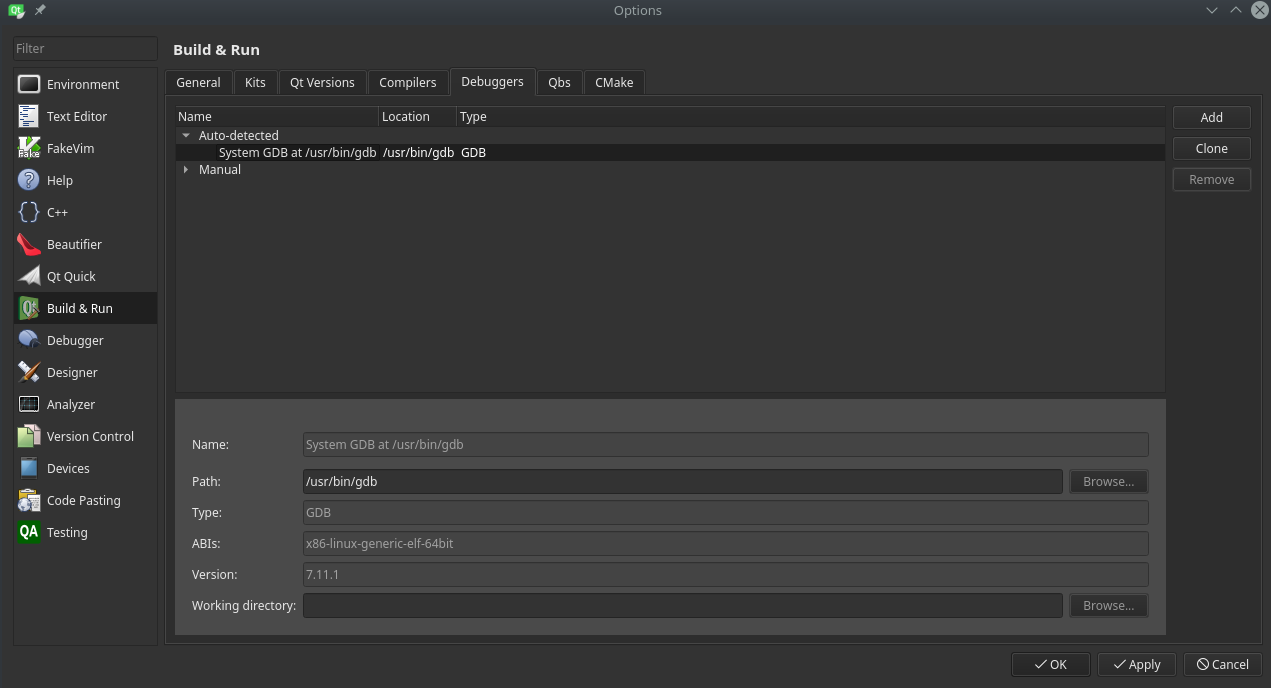
For the purpose of remote debugging we will have to select the GDB and clone it (rename the clone gdb-remote). In the GDB remote, the only thing we will change is the “working directory”. Set it to /opt/myRobot/root (We will see what this folder is for later)
Creating a Kit
The Kit will be more or less the total config (device, debugger, compiler etc). In the same window go to the tab Kits
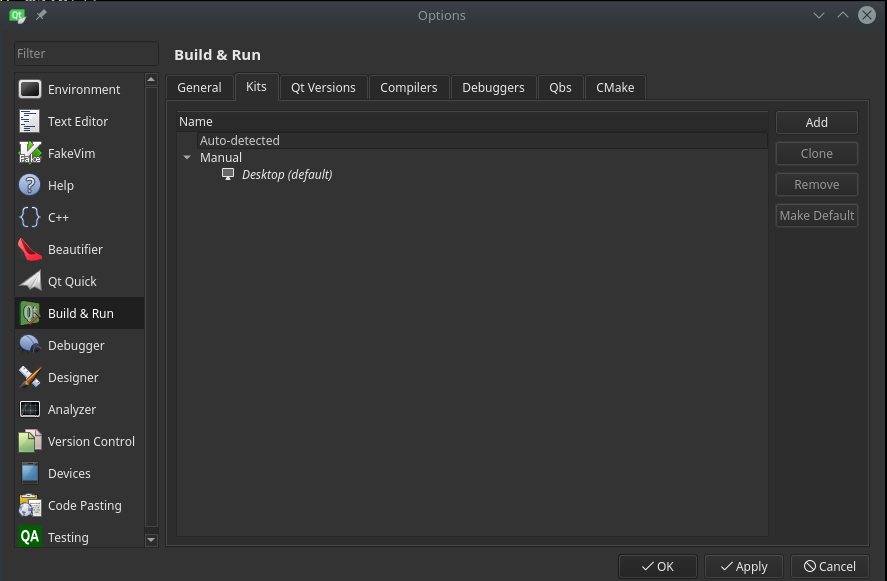
Here you should see your desktop as the default kits. We will have to add a kit for our robot since we don’t use the same device and the same debugger. So click on “add” and fill the correct device and debugger
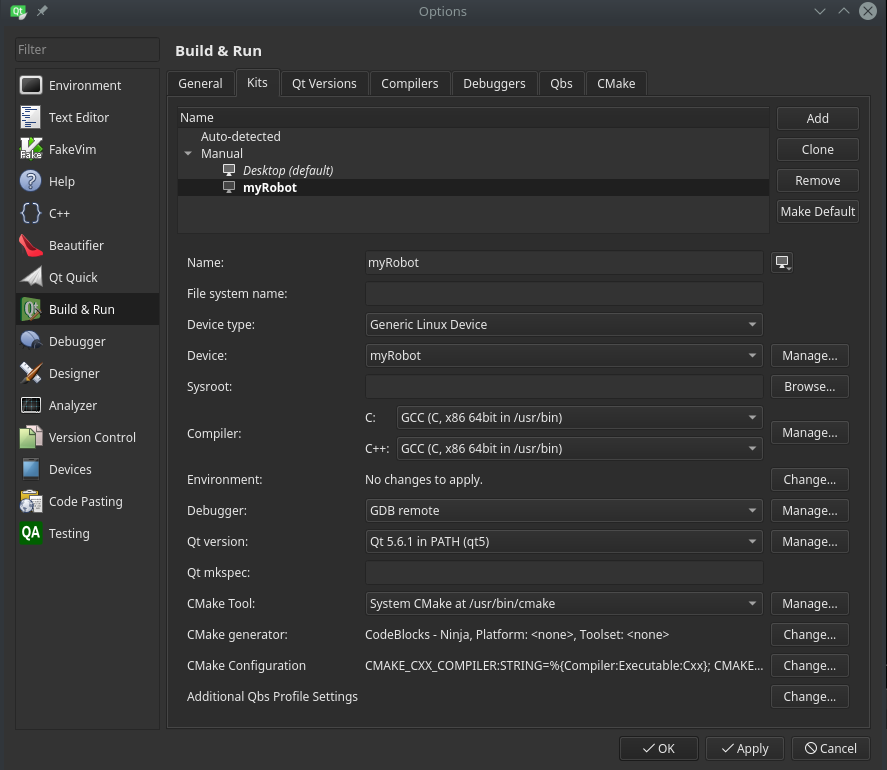
Add robot libs and sources
Unfortunately if you stop here you will be able to set breakpoints but not to browse your source files. The reason you added a working directory in your debugger is only to be able to browse your source files. Thus you will have to add your libs and source file to your computer. You will have to create the folder /opt/myRobot/root in your computer and place it the content of /usr, /lib and /tmp (in my case since my source code is there) in the root folder.mkdir -p /opt/myRobot/root
cd /opt
sudo chown -R ${USER}:${USER} myRobot
Then, connect to the robot and create an archive made of the 3 directoriesssh myrobot
tar czf myRobot.tar.gz /lib /usr /tmp
And Finally from your computercd /opt/myRobot/root
scp theuser@myRobot:/myRobot.tar.gz .
tar xzf myRobot.tar.gz
Make sure that under your “/opt/myRobot/root” directory you have lib/, usr/ and tmp/ (or any other directory containing your source).
This step is pretty incommode. There is maybe a way to read dynamically the files over ssh but I don’t know how to do that.
The debugging
The setup is now completed we can start debugging. Make sure the setup of the robot and of your computer are done and that the test program is running on the robot.
In Qt Creator Debug -> Start Debugging -> Attach To Running Application…
Here select your kit (myRobot) and in the filter the name of your app (teste in my case)
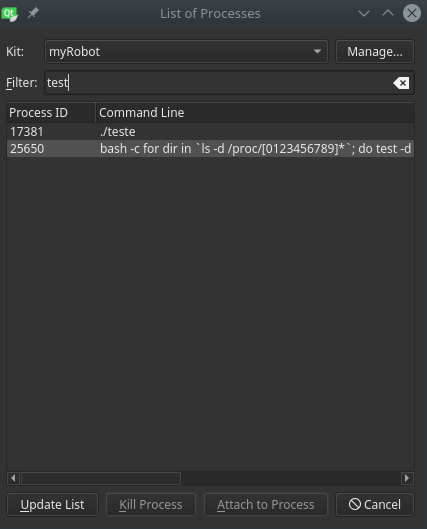
Select the process and then “Attach to Process” and voila!

Here you can place breakpoints, evaluate expressions etc.
If anything goes wrong please have a look in the compile output tab and check what went wrong.
If you have any suggestion/question/remark please don’t hesitate to leave a comment.